Spring Is the Time for Homemade Compost
By • April 20, 2021 0 530
It’s springtime in a Georgetown garden (this reporter’s, actually). The robins and blue jays are all taking noisy turns bathing in the cleaned-out bird bath. The camellia tree is popping with dozens of glorious blooms. Almost all the new azaleas bought last year survived. The flower beds and very patchy (well, bald, really) lawn areas have been raked and cleared. Bags of grass seed and pots of annuals await planting.
Now is the time to uncover the newest and greenest of home gardening projects, which has been cooking for almost a year in the back garden area: homemade compost to enrich the soil and boost the production of everything grown in the garden.
“Compost is a living soil amendment, a dark, crumbly, earthy-smelling material produced by the natural decomposition of organic materials,” according to zero-waste experts. Stefan Roha, Brenda Platt and Linda Brolis were the mentors for dozens of D.C. residents who enrolled last spring in an intense, two-hour online workshop on how to make your own compost.
The handout materials (PDFs) were copious and well-illustrated. Participants who proceeded to build or buy one of the various types of composters would be rewarded not only with a ready supply of rich compost material, but with the virtuous feeling that their food waste, garden and lawn cuttings, dead leaves and such were being used in an extremely environmentally friendly way. Their efforts might also result in a rebate check from D.C. of up to $75.
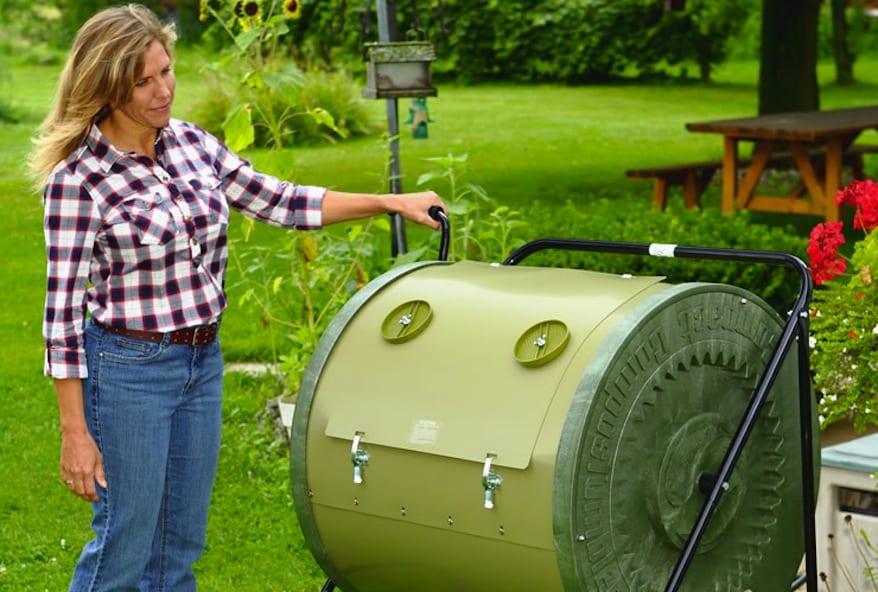
The compost-making process can be a bit overwhelming at first, with a lot of initial decisions to make: where to dedicate an area for composting, whether to follow the “slow cold” or the “faster hot” process and what kind of composter to use. Would a framed structure, a covered bin of some kind or one of a variety of store-bought composters — either stable or a “tumbler,” which is manually revolved — be best? There are also many types of receptacles in which to gather food waste, from covered buckets to really cool little pails with inlaid decoration.
Then there’s the recipe for assembling the waste: greens and browns. Simply put, there should be lots and lots of browns (leaves) in proportion to fresh cut greens (lawn cuttings, plants and food waste, including uncooked vegetables and eggshells). Some newspaper and cardboard can also be included as greens. Several formulas were offered; 30:1 was recommended.
Some recipes call for piling the waste material in layers. Others say to deposit the food waste in a nest of leaves. All require that the material be watered regularly — less in the cold method, more in the hot — and turned by shovel or tumbler (some recommend five spins per day). In the hot method, the temperature should be taken regularly and moisture adjusted with more leaves or more water.
To pass the “squeeze test,” in which one squeezes a handful of the developing compost in one’s hand to see if it’s moist and compacted, could take about a year the cold way and six weeks to three months the hot way. The finished compost should then be used or stored and the composter readied for a new supply of raw material.
In the District, the Home Composting Incentives Amendment Act of 2018 stipulates that the owner “may engage in composting on his or her residential property; provided that the composting … does not promote the development, attraction or harborage of vectors or create a public nuisance.”
As for this reporter’s project, opening the compost tumbler — which I had filled most of the year but spun irregularly — was like taking a cake out of the oven during a bake off. Let’s just say that the product produced this year was a good learning experience for next year.
Workshop information is available at zerowaste.dc.gov.